Happy Monday everyone! We are finally getting settled into our new home, and finally able to start getting some decorations up on the walls! I’m in full on nesting mode with Raegan due in just 6 short weeks, so I of course had to start in her nursery!
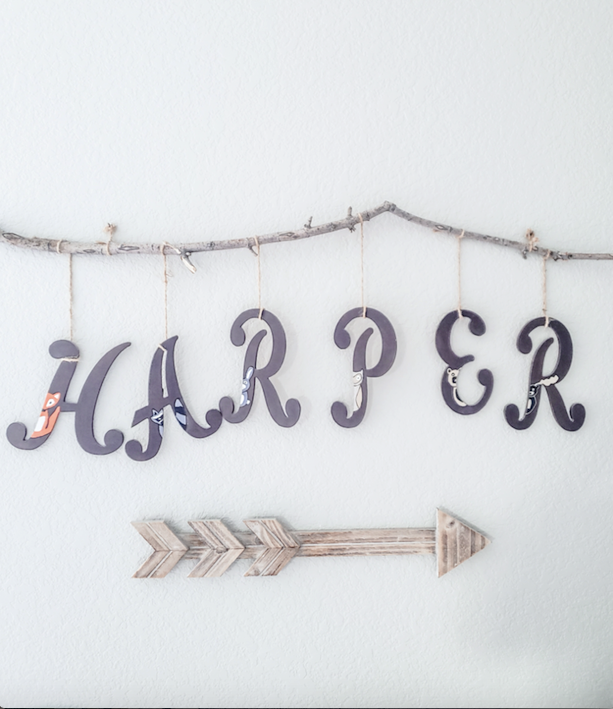
When I was pregnant with Harper I took a lot of time on this name sign I made to hang above her bed. As you can imagine, all the little woodland animals took some time. And now that I have a toddler, were settling into a new home, and 6 weeks till the due date, I know I had to find something a bit simpler to try!
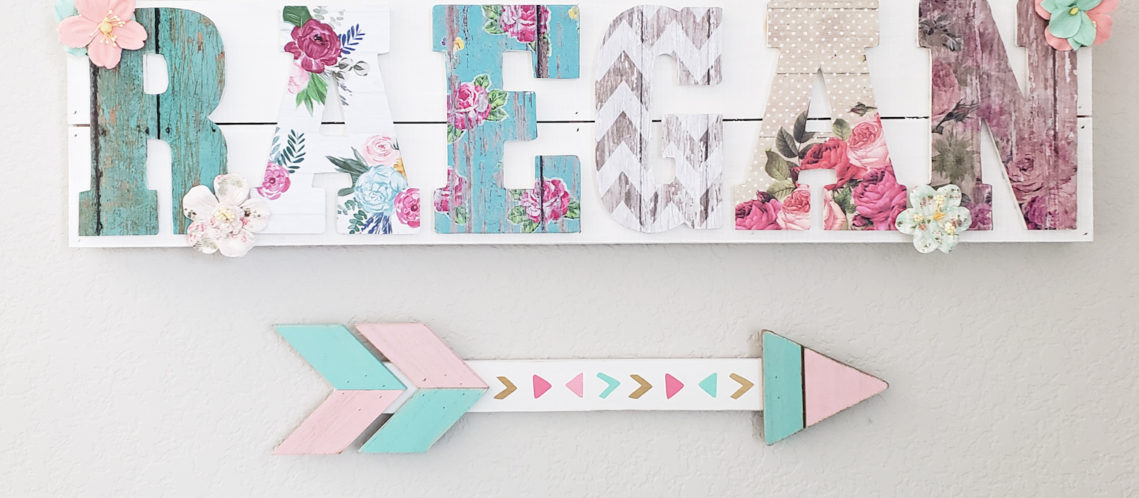
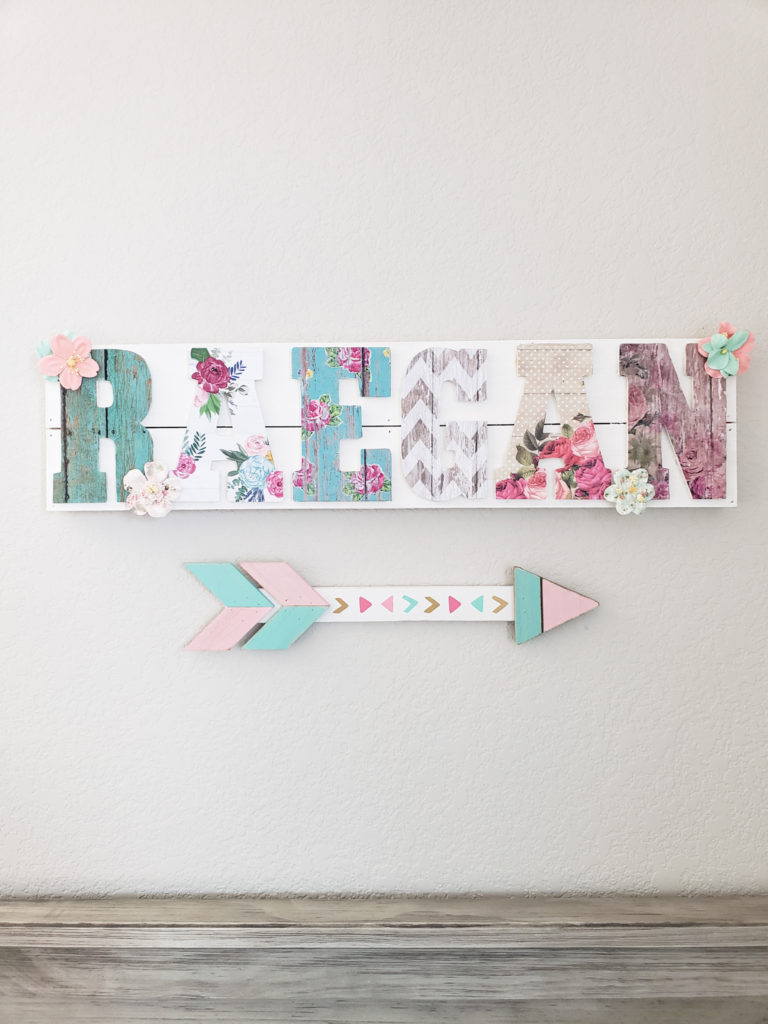
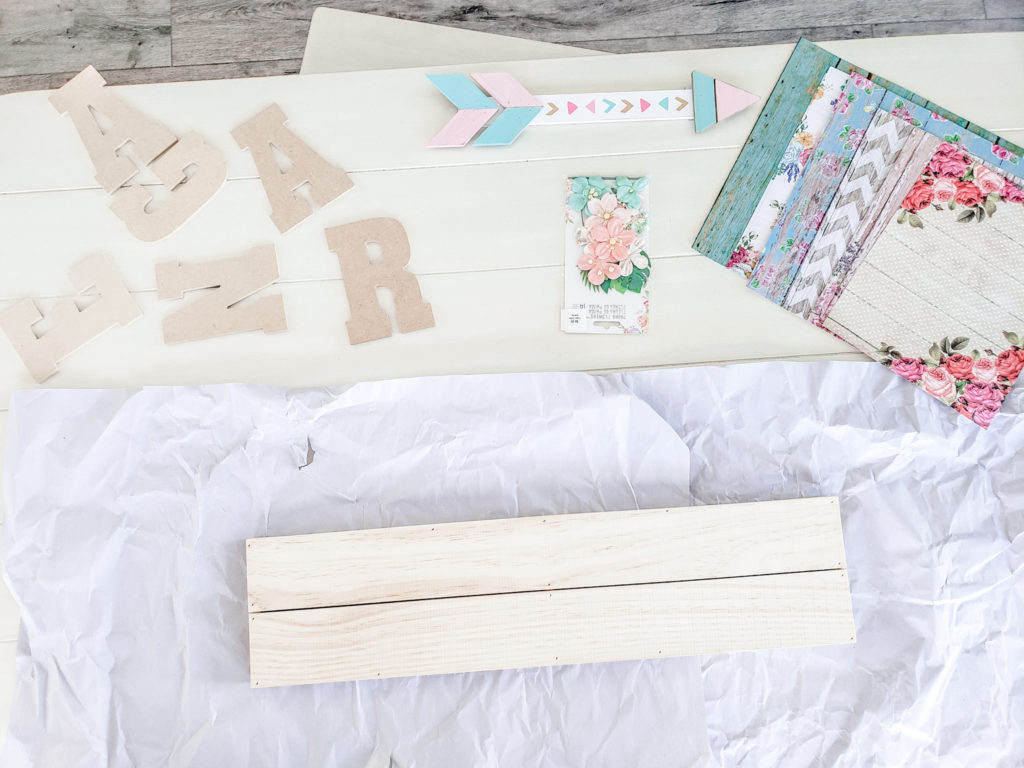
This was a really simple project, I already had everything I needed on hand other than the wood and wooden letters. I was lucky enough to find this wooden board at hobby lobby that was the exact length I needed to fit Raegan’s name. If you find your self needing something longer, it is very simple to use some wood glue to attach individual planks together! But if you’re lucky enough to have a name that fit’s here’s what is needed for my fun little recipe to a DIY Nursery Name…
Ingredients:
- Wooden board to attach letters
- Wooden letters
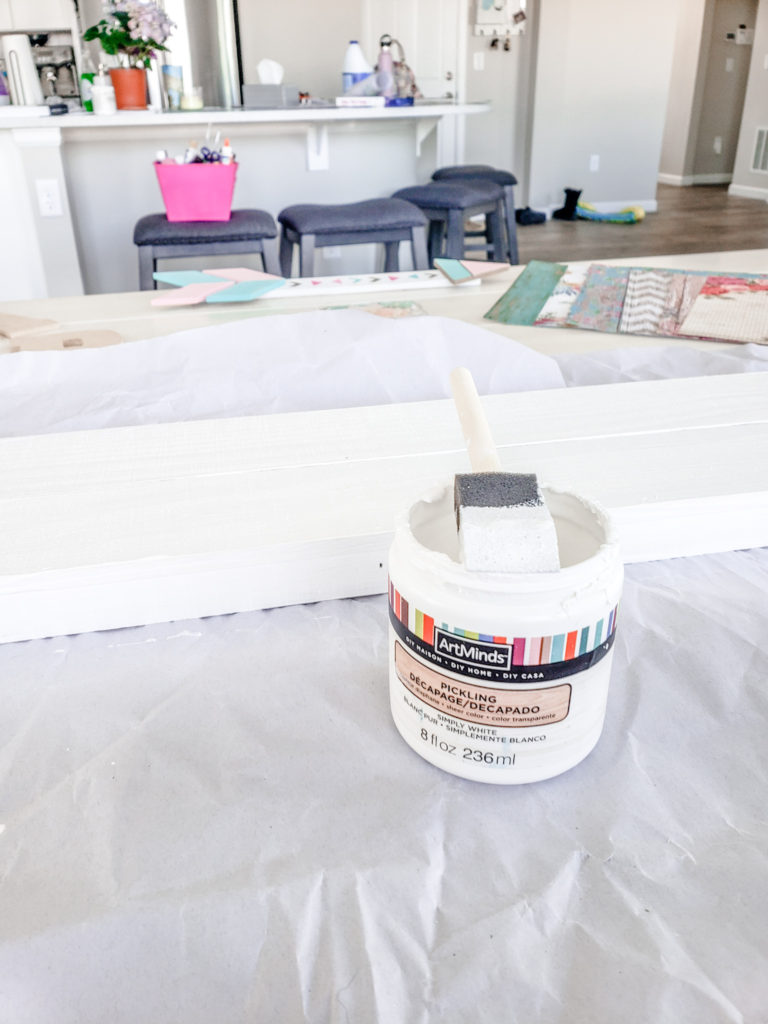
- White paint
- Foam brush
- Mod Podge (I used Matte)
- Assortment of scrapbook paper
- Flower’s or other items to attach to the sign to add a 3D look
- Wood glue
- Hot glue gun
Directions:
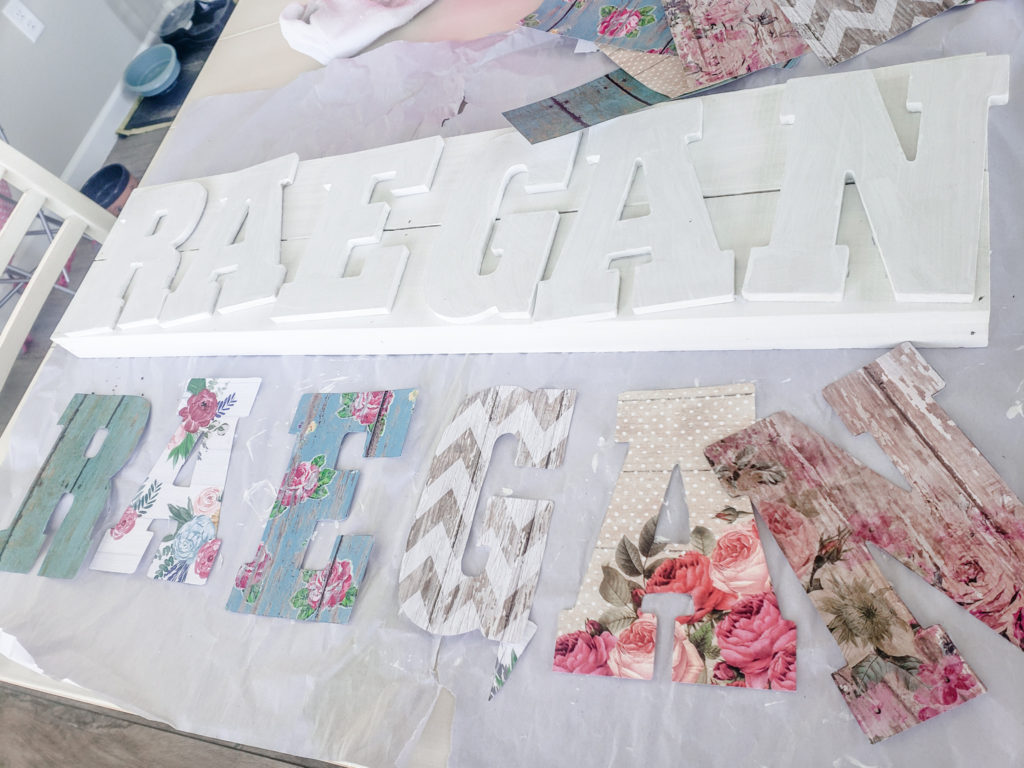
- Paint/stain your wood with your desired color. If your letters are not already painted white, paint them white. As you mod podge the scrap book paper onto the letters, some papers can become a bit transparent and whatever color the wooden letter is will show through the paper. You’ll also wanted to pain the letters white so that I didn’t have to scrap book the edges/outsides of the letters.
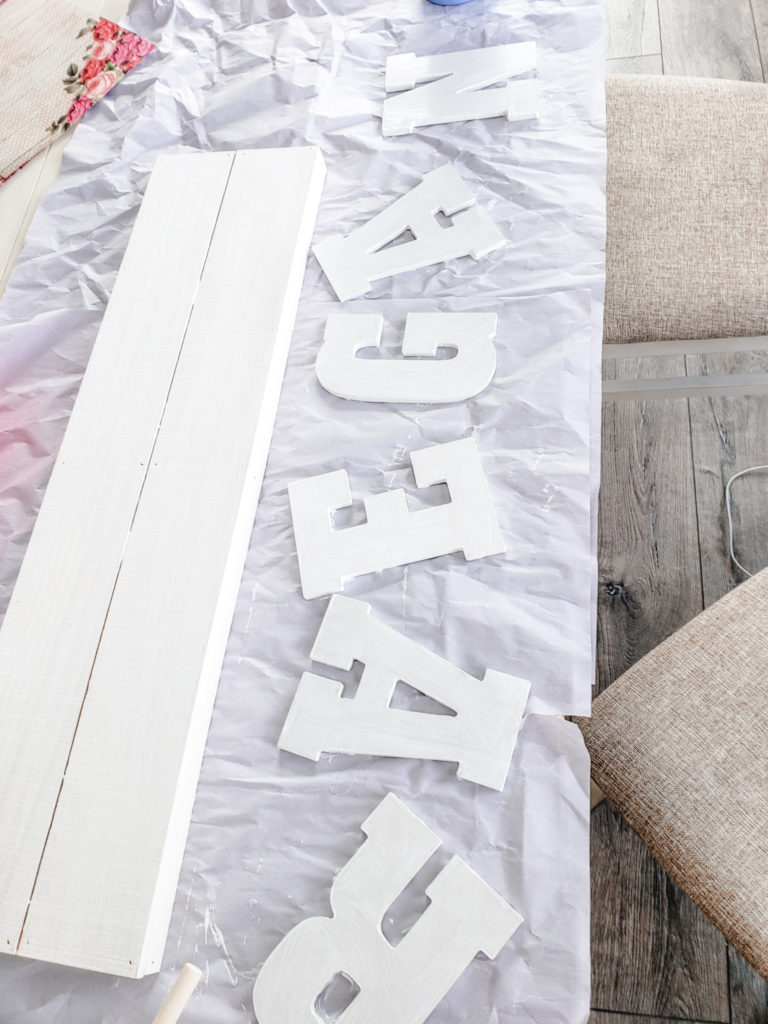
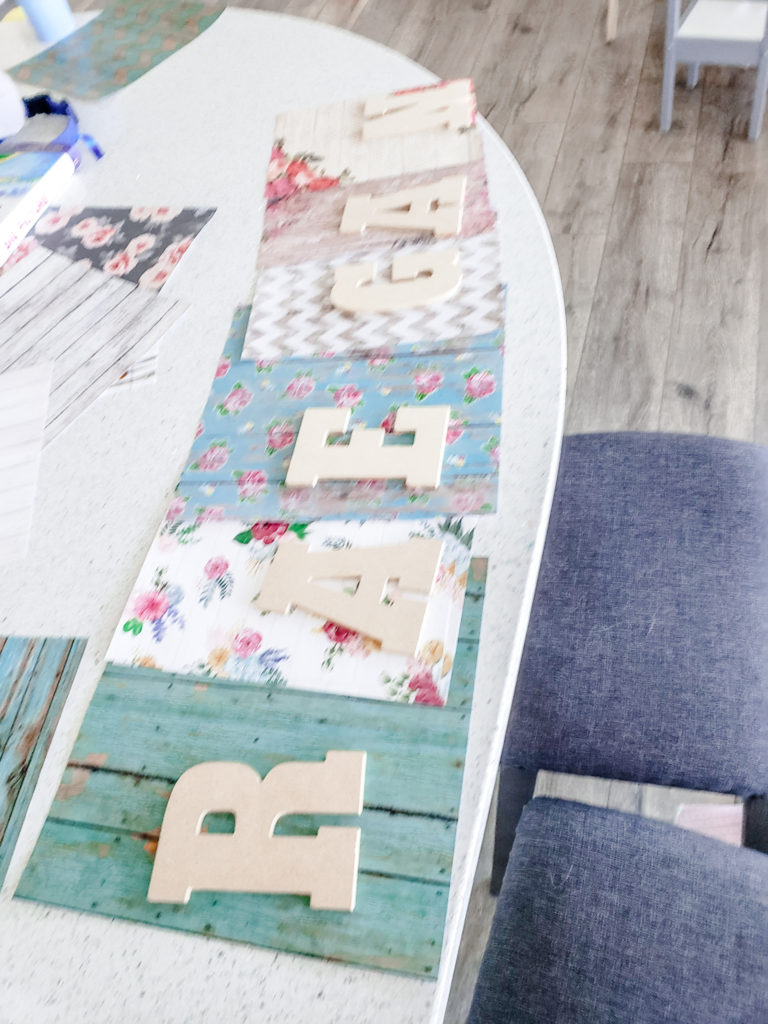
2. Once your letters have completely dried, figure out how you want to arrange your scrap book paper assortment. I laid out each paper with the letters to make sure I liked the look, I didn’t want two similar patterns/colors right next to each other.
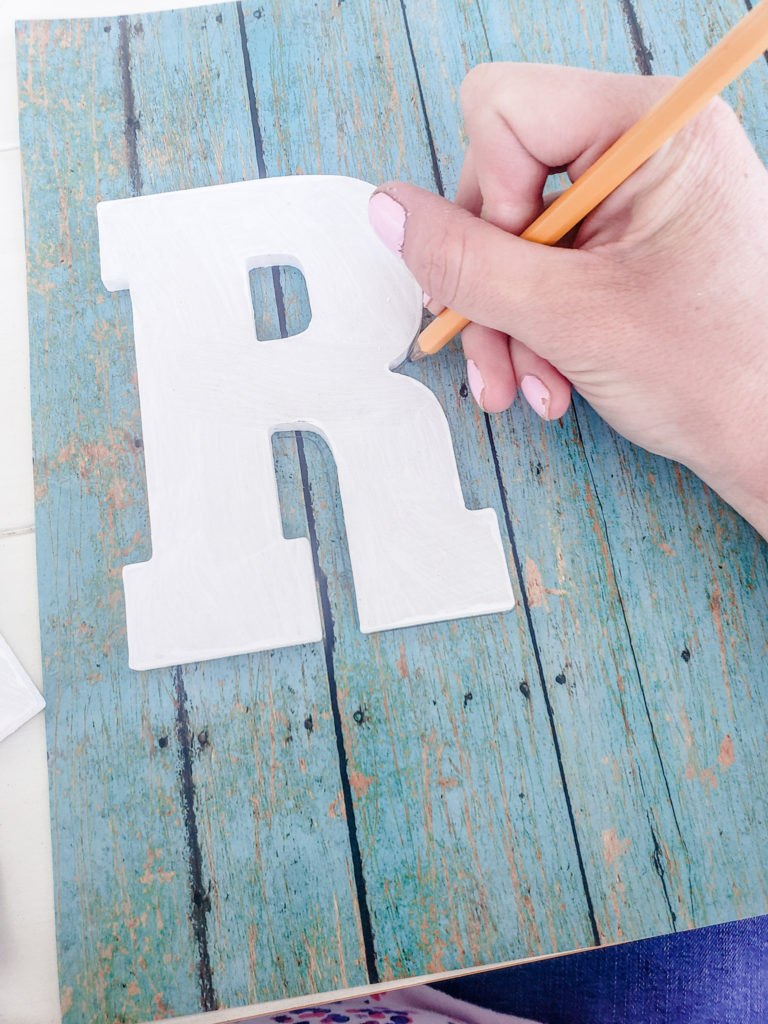
3. Trace each letter with a pencil, carefully cut out. As you begin to trace, pay attention to what pattern will be on the letter- for example, don’t just place the letter in the bottom corner of the page, find what pattern you want on the paper and place the letter here.
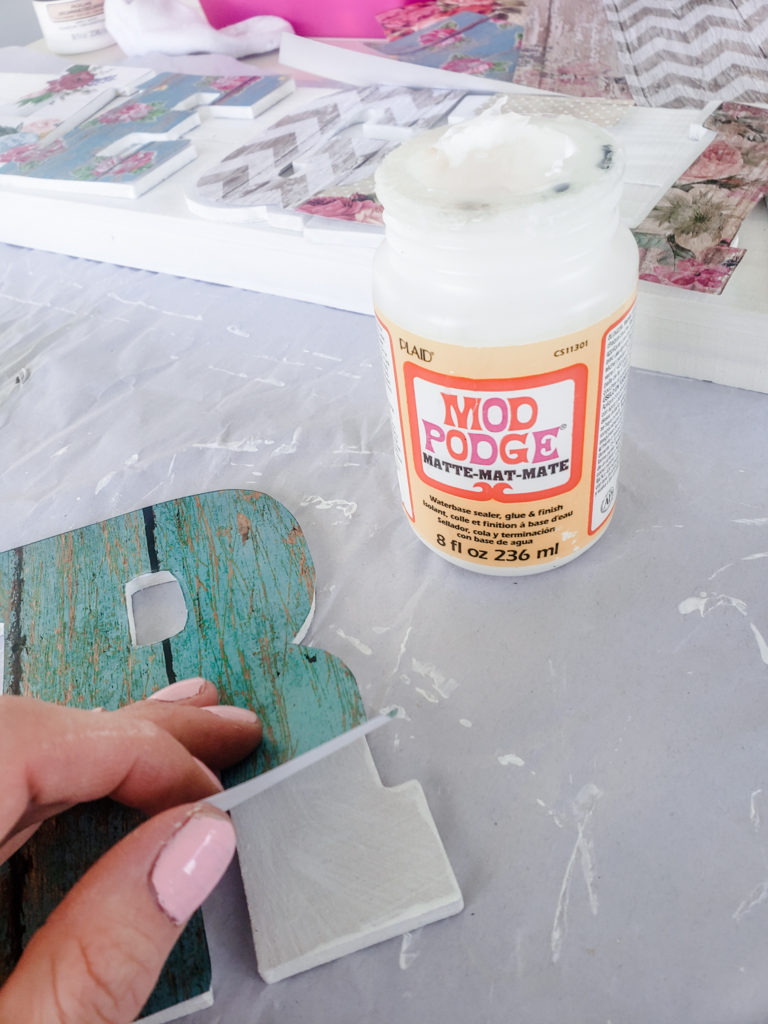
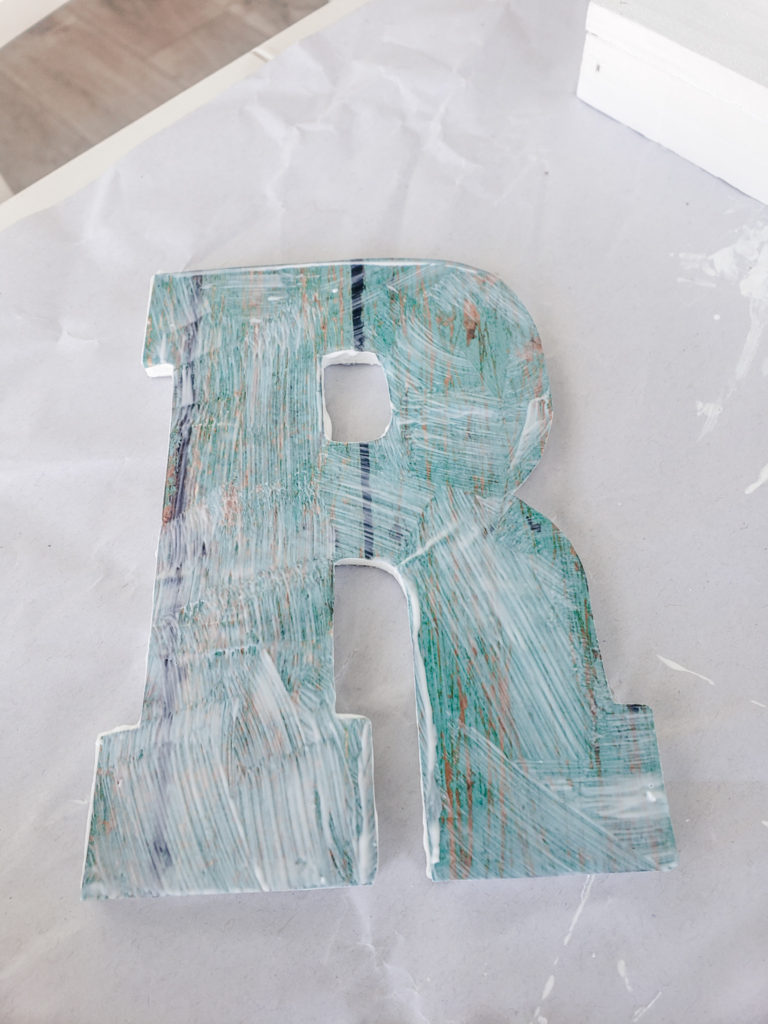
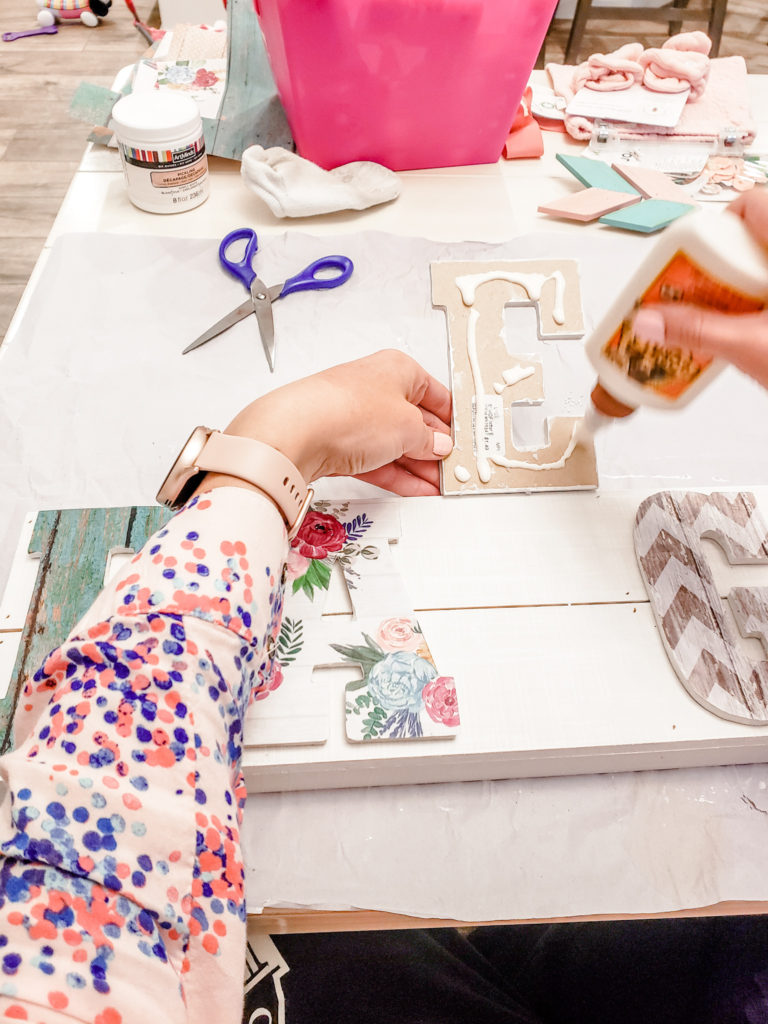
4. Set each paper cut out on it’s corresponding letter. One letter at a time, carefully lift up small portions of the paper to apply mod podge to the wooden letter, gently pressing down to get rid of any air bubbles and smooth into place. Focus on a small section of the letter at a time, rather that coating the whole letter with mod podge at once. This will help control paper placement and will help prevent air bubbles. once all papers have been applied and have had time to dry-start applying a top coat. Coat the entire letter and edges with mod podge. It will look cloudy- don’t worry it will dry clear!
5. Once mod podge has completely dried, arrange letters onto your wood board. Using the wood glue, carefully lift up each individual letter, apply wood glue, then gently press into place.
6. Lastly- once the wood glue has set, arrange flowers or other 3D objects as desired, then hot glue into place. Your sign is now ready to hang!

I hope this adds the perfect touch to your little one’s nursery and something they can keep forever! It makes it all the more special knowing it was custom made with love by their very own mama 🙂
